Samsung Galaxy S22 is a powerhouse of a smartphone, offering a stunning display that supports various refresh rates to enhance user experience. The refresh rate of a display determines how many times the screen refreshes the image per second, providing smoother visuals and improved responsiveness.
In this comprehensive guide, we will walk you through the steps to change the refresh rate on your Samsung Galaxy S22. This guide is based on detailed information provided by Samsung, ensuring that you can easily understand and implement the steps to optimize your device’s display settings.
Understanding Refresh Rate
Before we delve into the steps, it’s essential to understand the concept of refresh rate. The refresh rate is measured in Hertz (Hz) and represents the number of frames displayed per second. A higher refresh rate results in smoother motion, making it ideal for activities like gaming and scrolling through apps.
Steps to Change Refresh Rate on Samsung Galaxy S22
Follow these simple and straightforward steps to change the refresh rate on your Samsung Galaxy S22:
1. Access Settings:
- Begin by unlocking your Galaxy S22 and navigating to the home screen. Swipe down from the top of the screen to access the notification panel, then tap on the gear-shaped Settings icon in the top right corner to enter the Settings menu.
2. Navigate to Display Settings:
- In the Settings menu, scroll down and select the “Display” option. This will open a submenu with various display-related settings.
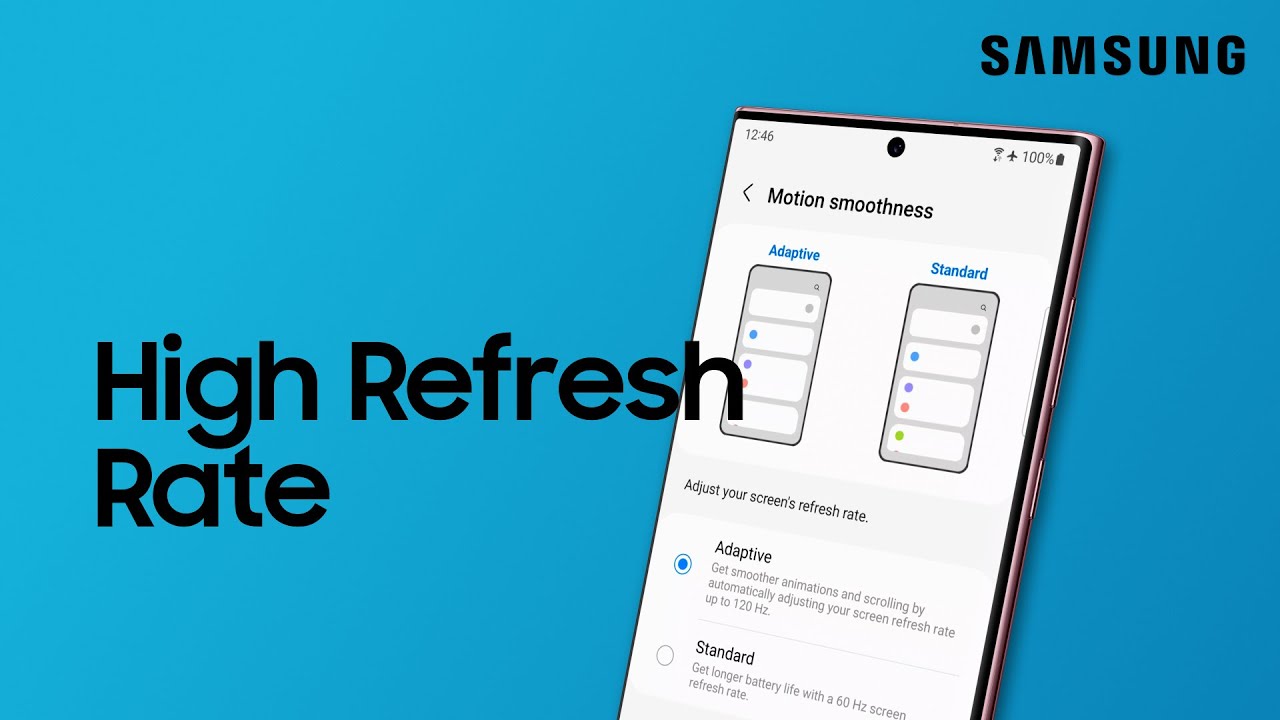
3. Choose Motion Smoothness:
- Within the Display submenu, look for an option named “Motion smoothness” or “Screen refresh rate.” Tap on this option to access the screen refresh rate settings.
4. Select the Desired Refresh Rate:
- In the Motion smoothness settings, you will see a list of available refresh rate options, such as 60Hz, 120Hz, and 240Hz. Tap on the desired refresh rate to select it. Your Galaxy S22 will automatically apply the chosen refresh rate.
5. Confirm the Changes:
- After selecting the new refresh rate, your phone will display a confirmation message asking if you want to apply the changes. Tap “Apply” or “Confirm” to confirm your selection.
6. Enjoy the Enhanced Experience:
- Once the changes are applied, you can enjoy a smoother and more responsive display experience on your Samsung Galaxy S22. Whether you’re gaming, watching videos, or simply browsing, the optimized refresh rate will enhance your overall user experience.
Conclusion
Changing the refresh rate on your Samsung Galaxy S22 is a simple yet effective way to customize your device according to your preferences. By following the steps outlined in this guide, you can easily access the display settings and select the refresh rate that suits your needs best. Whether you prefer a standard 60Hz for everyday use or a higher refresh rate for gaming and multimedia applications, the Galaxy S22’s flexibility allows you to tailor the display to your liking.
Samsung’s commitment to user-friendly interfaces ensures that adjusting the refresh rate on the Galaxy S22 is a hassle-free process. By providing users with the option to customize their display settings, Samsung enhances the overall user experience, offering a device that adapts to various usage scenarios.
Embrace the smoothness and responsiveness of a customized refresh rate on your Samsung Galaxy S22, and elevate your smartphone experience to new heights. Enjoy seamless scrolling, fluid animations, and immersive gaming, all thanks to the straightforward refresh rate adjustment options available on your device. Stay tuned to Samsung’s official resources for more tips and tricks to make the most out of your Galaxy S22.